3 tips from resizing images with macOS Shortcuts
Note: I’ve structured this post like a recipe blog. There’s the preamble with how I use this shortcut, then at the bottom there’s the tips you might’ve come here for.
Though I’ve been a heavy users of the Shortcuts app on iPadOS & iOS for a long time, I’ve recently started delving into what Shortcuts on macOS can do. One of its most intriguing system integrations is the ability to run automations directly from Finder, with “Quick Actions.”
One task I find myself constantly doing as a web developer is resizing images & compressing them. For example, after an illustrator produces a high-resolution image asset, I can back-of-an-envelope calculate the maximum resolution that would ever be needed in a design. Though most of my sites use Next.js Image Optimization, not all do, & even with Next.js, there’s no point in starting from a needlessly large image, as it takes longer to compress/serve.
On iOS, for awhile I’ve used a shortcut to resize images using the native Shortcuts action then upload them to TinyPNG for compression & download the result, but it can take more than a few seconds for that process.
On the Mac, there’s more options to turn to. Pixelmator Pro is an indispensable image editor—I use it near-daily for tasks like cropping, light/color adjustments, & lots more. With their macOS Monterey update, the team added deep Shortcuts support, opening up the use of their image editing tools via automation.
All of which brings me to my Resize and Optimize shortcut, which I now have pinned in the bottom right of my Finder window for processing images with:
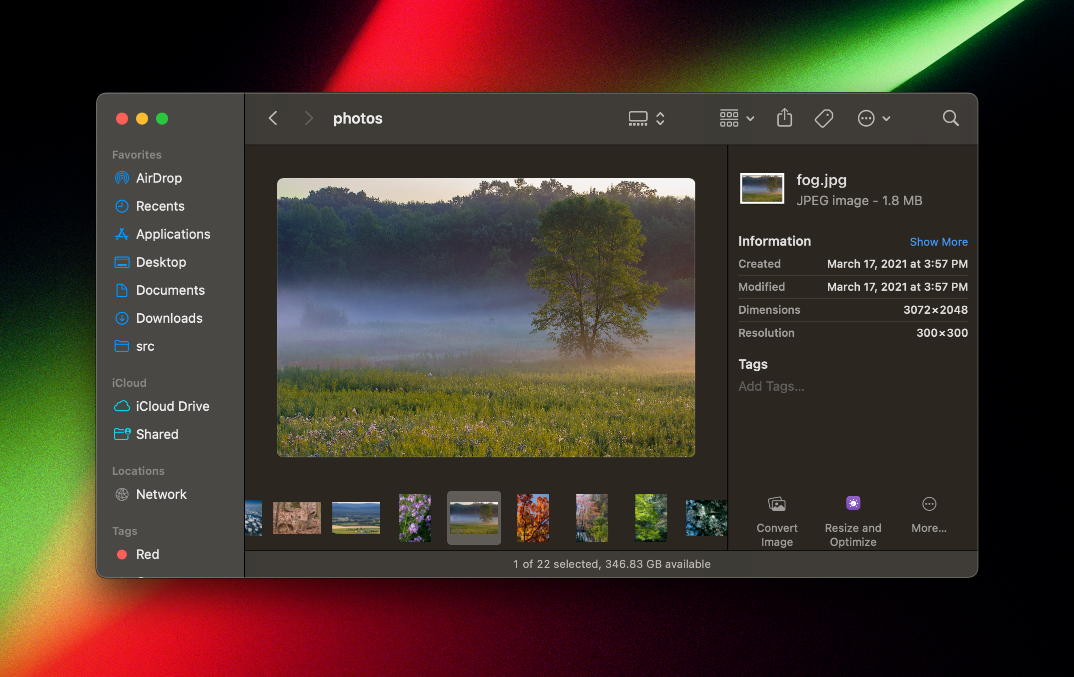
I can run it via the Menu Bar or the Quick Action, & for each file it asks what size (by longest edge), prefilling 50% scale, resizes the image, then compresses it to either JPG or PNG, depending on the original file type. It overwrites the image in-place, obviating the need for multiple folders of versions.
Three new techniques came into play building this shortcut, which I’m documenting here partly for my future self.
Calculating the longest dimension of an image
The most common resizing I want to do is 0.5x. Previously, I would manually check the dimensions of an image in Finder, see which dimension is longer, then type dimension/2 into Spotlight, & retype that number into the resize prompt. I wanted to embed that behavior into the shortcut as a customizable default. While you can immediately grab both the width and height of an image in Shortcuts, “the longer dimension” is less obvious, though that’s what I want to provide to Pixelmator for resizing; there are scenarios where I want to override that default, such as resizing several images to each the same dimensions for use in the same gallery.
I applied a trick @viticci shared recently for filtering shortcuts to this dimensions problem, the Filter files action:
- Add both the width & height to a variable,
Dimensions - Filter files, but filter the
Dimensionsvariable,Z → A(largest number first), limit1 - Get numbers from input
- Calculate to divide by 2
- Round to nearest pixel
- Ask for input, because you can only provide a default answer to an ask for input, not an “ask each time” parameter
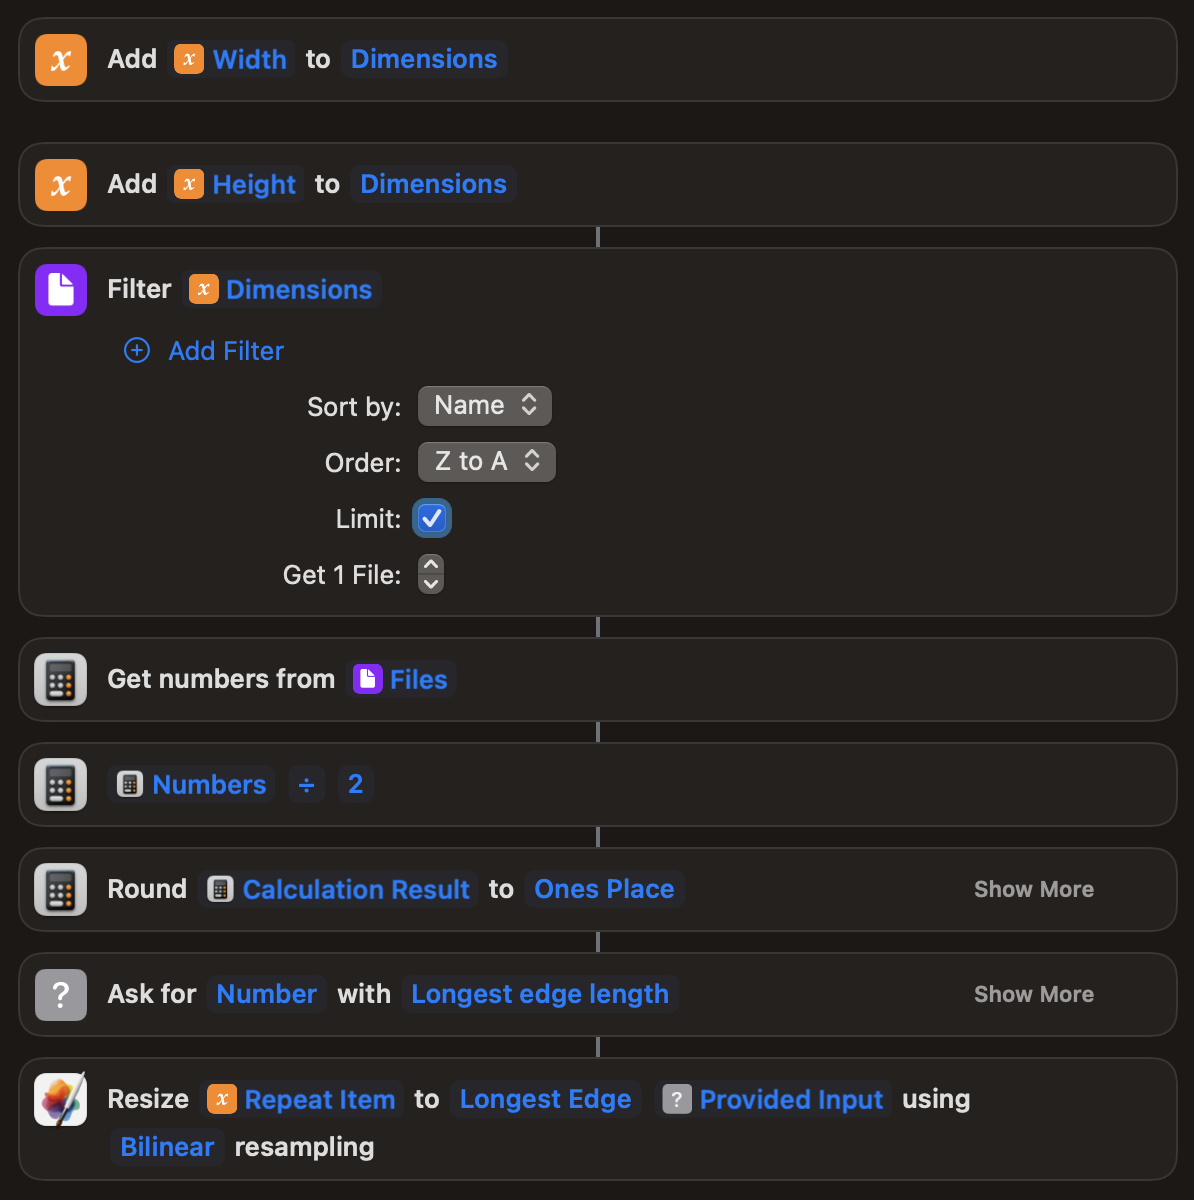
Though convoluted in Shortcuts form, this code runs near-instantly, immediately presenting me with the most scenario pre-filled but still giving me full control of the image dimensions.
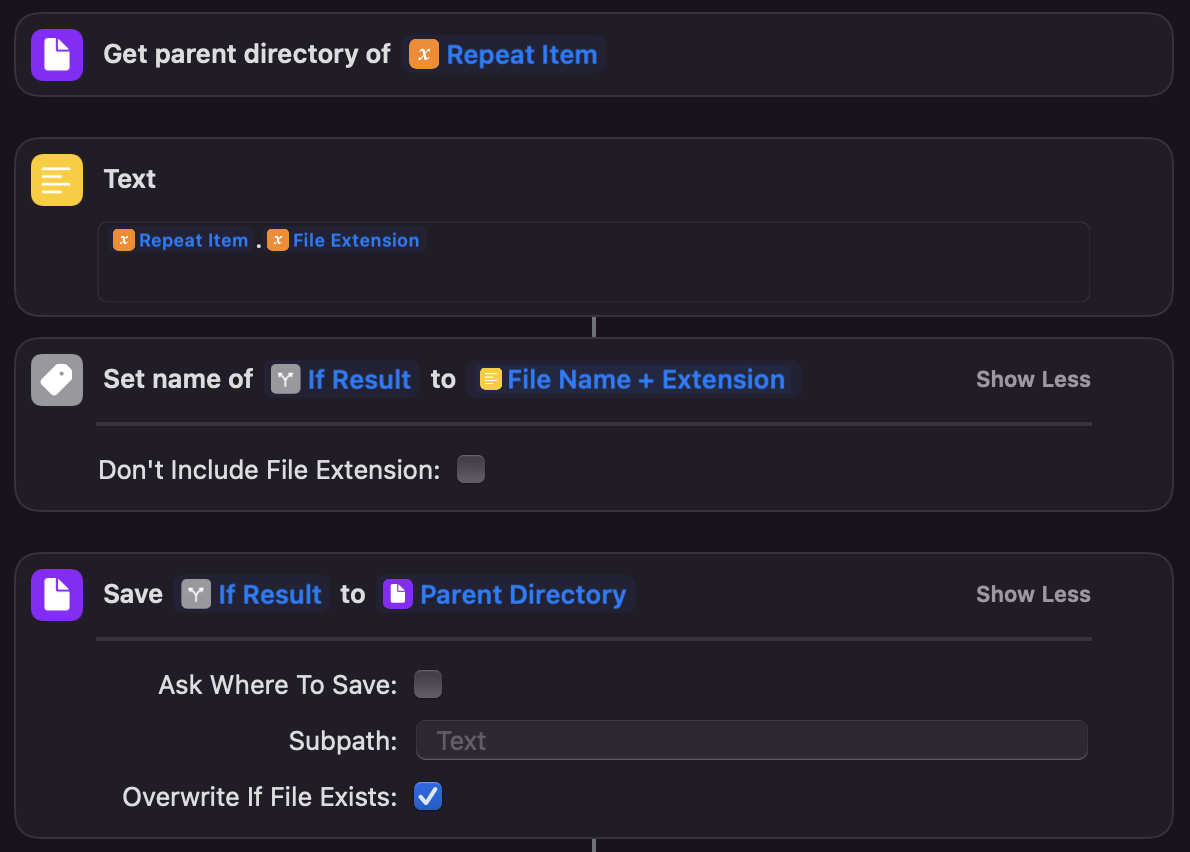
Overwriting the entry file in Finder
I ran into trouble figuring out how to get the modified file to overwrite the input file/save directly into its parent directory. I asked over in the Club MacStories+ Discord, & @viticci helpfully pointed to a reference shortcut to learn from. There’s 4 steps:
- Get parent directory, a macOS Finder-specific action for use as a magic variable
- Get the file name, with extension. The easiest way is a text block of
[File name].[File extension], reading from the entry file, but you could also split the file path by/& get the last item. - Set name of modified file to file name with extension (#2)
- Save modified file to
Parent Directory
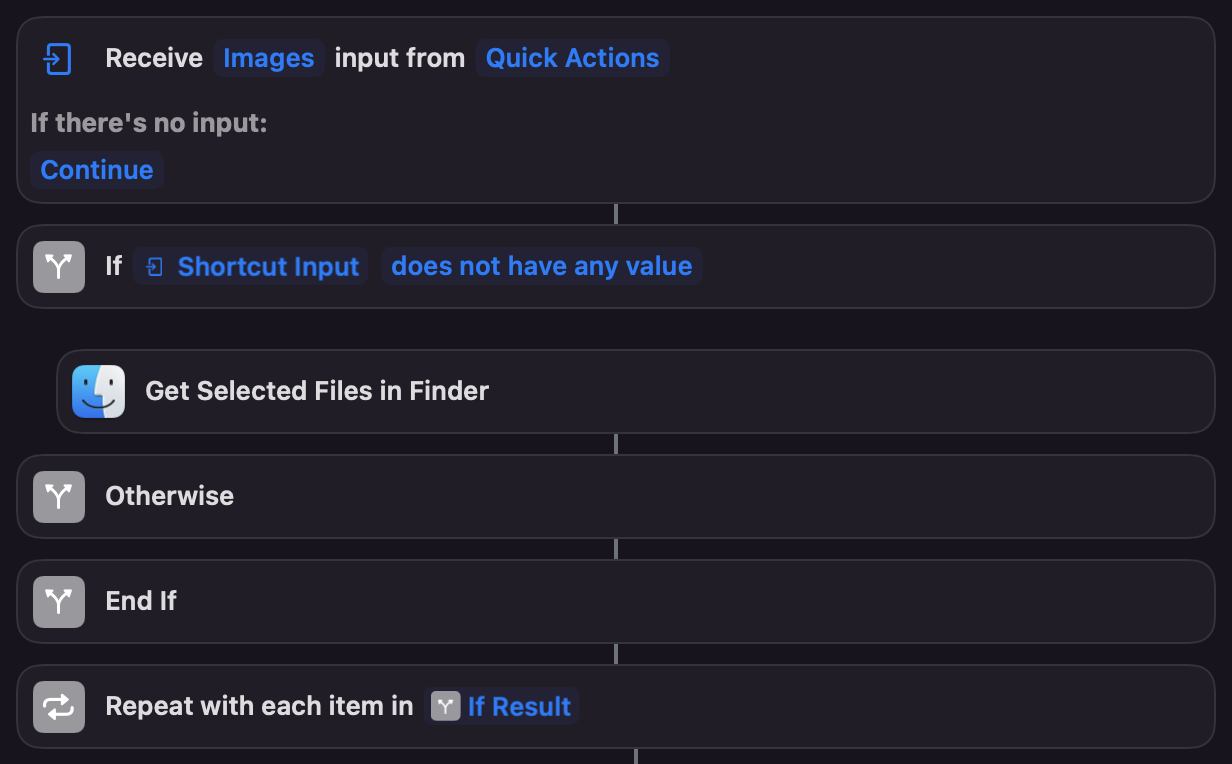
Making a great shortcut for Finder
I always try to make shortcuts as flexible & input-method-agnostic as possible. While Quick Actions are often the easiest to reach for, allowing the shortcut to run independently enables it to be run from the menu bar or an external source like a Stream Deck. The Get Selected Files in Finder action is great for this. For Finder shortcuts, I recommend:
- Configure the entry to Receive files/photos/folders/as appropriate from
Quick Actions; if there’s no input,Continue - Start the shortcut with an If checking if there’s shortcut input
- If it has no value, Get Selected Files in Finder
- Repeat with each item in
If Result(which will be either the Quick Actions files or the selected ones), so you can select as many files as you need & the shortcut runs on each
Download Resize and Optimize here, which requires Pixelmator Pro.